Table of Contents
As a PPC agency in Australia, we help businesses improve their marketing strategies and get more traffic to their websites. One of the most important tools we use is Google Analytics. It’s a free tool that helps you track your website traffic and user behavior, so you can make better decisions about your marketing.
Google Analytics has a new version called Google Analytics 4 (GA4), which is more powerful and can help you get even more insights into your website traffic. In this blog post, we’ll show you how to set up GA4 on your WordPress or Shopify site.
Why GA4?
Google Analytics 4 (GA4) is important because it offers several new features and improvements over the previous version of Google Analytics (GA).
Here are some reasons why you might want to consider upgrading to GA4:
- More Accurate Data: GA4 uses an event-based tracking system that captures more data than GA, providing a more accurate picture of user behavior on your website or app.
- Better Integration with Google Ads: GA4 is designed to work seamlessly with Google Ads, allowing you to create more targeted campaigns and track their performance more accurately.
- Enhanced Privacy Controls: GA4 has more privacy controls and allows you to collect data in a way that’s compliant with data protection regulations like GDPR and CCPA.
- Improved User Journey Analysis: GA4 provides a more complete view of the user journey, making it easier to identify the most effective marketing channels and optimize your website or app accordingly.
While you can continue using GA if you prefer, upgrading to GA4 can provide you with more accurate data, better integration with Google Ads, enhanced privacy controls, and improved user journey analysis.
It’s worth considering if you want to get the most out of your website or app and optimize your marketing strategies.
Setting Up Google Analytics 4 On A WordPress Site:
If you have a website that uses WordPress, you can follow these simple steps to set up GA4:
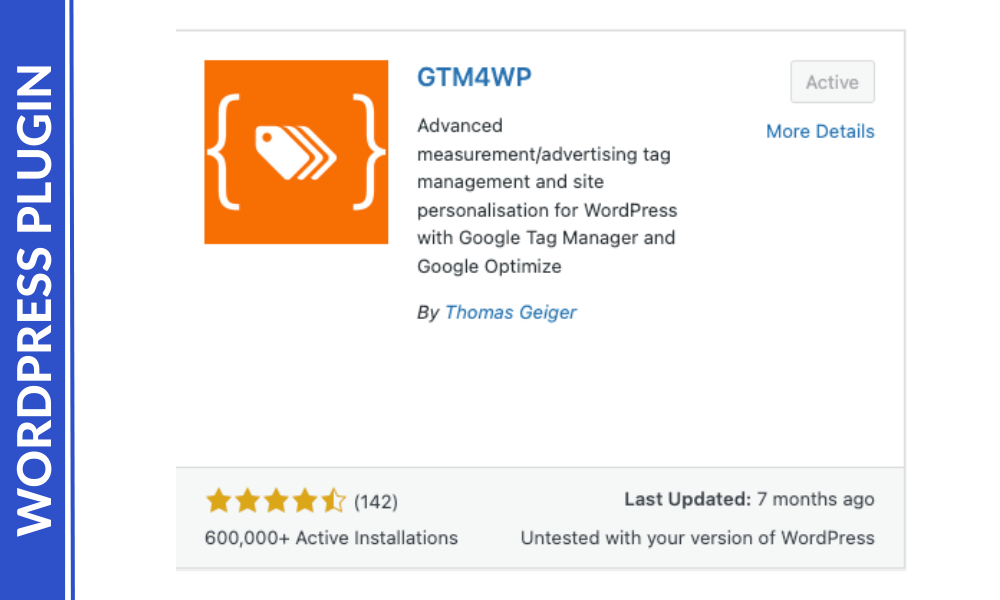
Step 1: Install GTM4WP plugin on WordPress
Login in to WordPress admin account.
Find “Plugins” on the sidebar, then click “Add New”.
Search “GTM4WP” in the search bar.
Click install and activate the plugin.
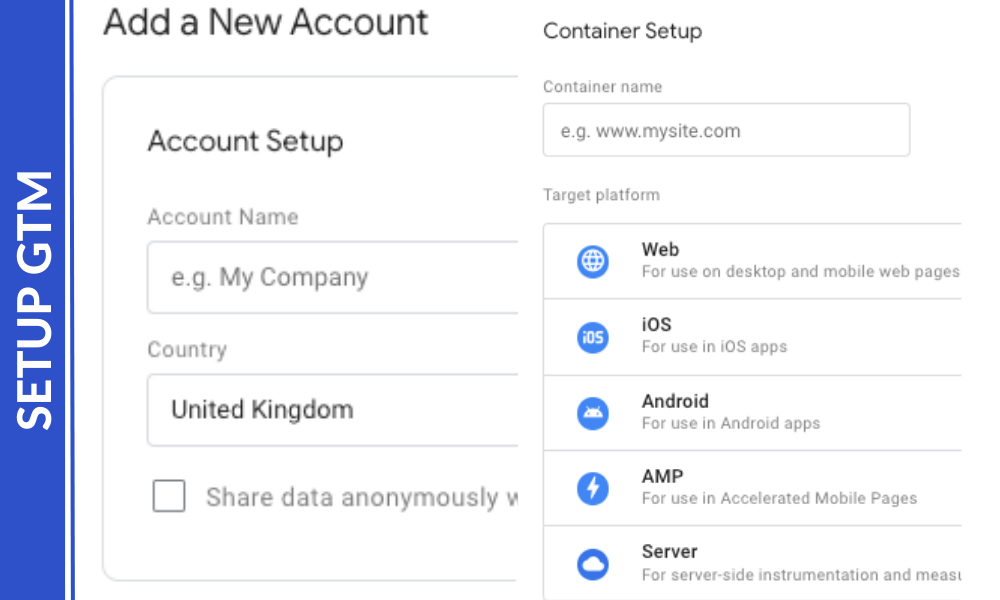
Step 2: Setup Google Tag Manager (GTM)
Go to Google Tag Manager (GTM), create account and container following the prompt.
Then, your GTM code/ID (aka. container code) where you can find in the Overview page.
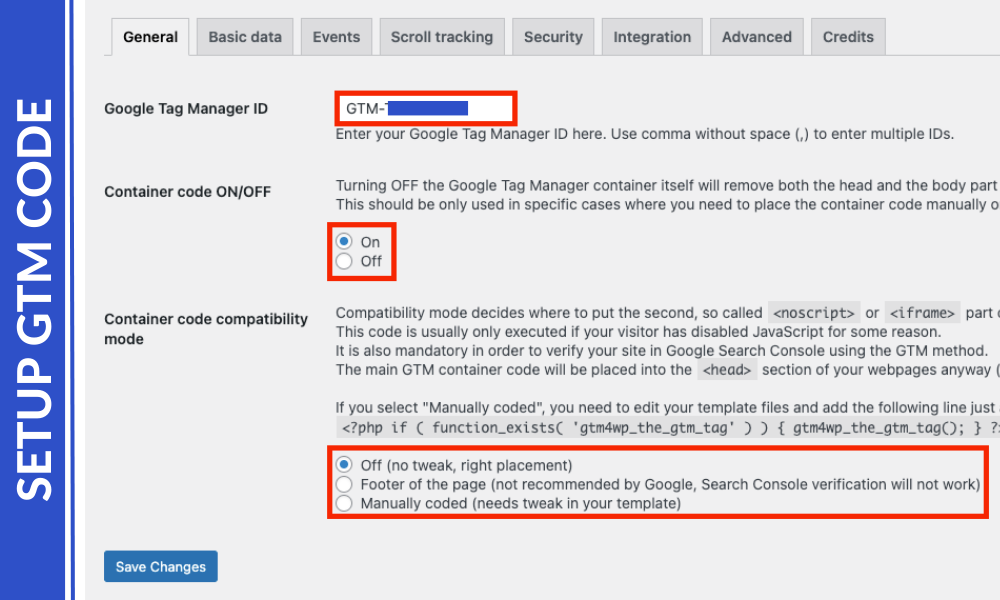
Step 3: GTM4WP Configuration
Go to “Settings” and click on Google Tag Manager on the side bar on WordPress.
Insert GTM code, and ensure to switch ON container code. Keep the “compatibility mode” to OFF.
Save the changes.
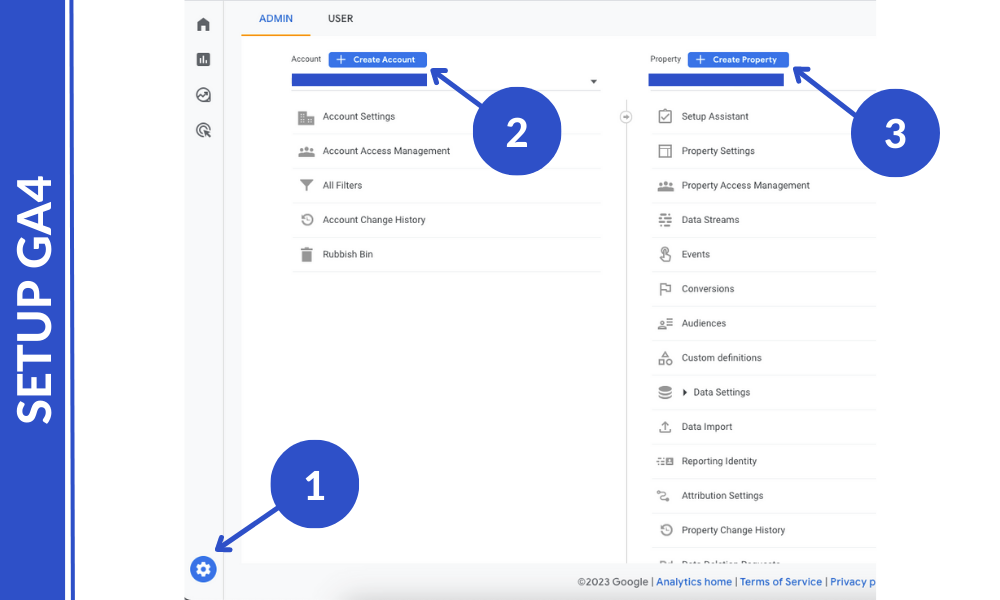
Step 4: Setup Google Analytics 4 (GA4)
Go to Google Analytics 4 (GA4), create account and property, fill up the details following the prompt.
You will get a Measurement ID once you finished setting up the account.
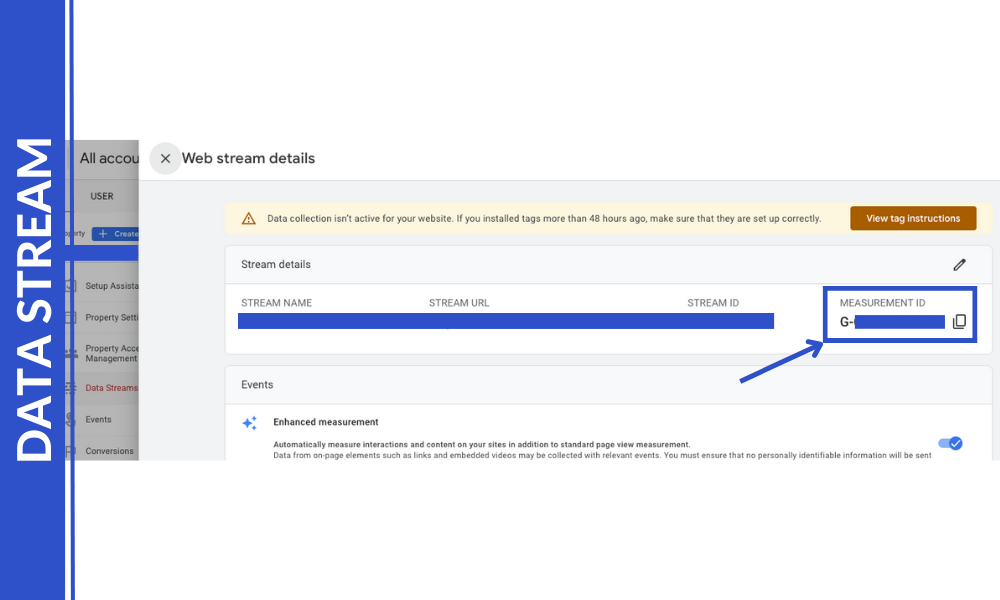
Step 5: Alternative way to find Measurement ID
On GA4, click the gear icon at the bottom left corner. Then go to property, click on “Data Stream”.
You will be able to find the Measurement ID once you choose one of your data streams.
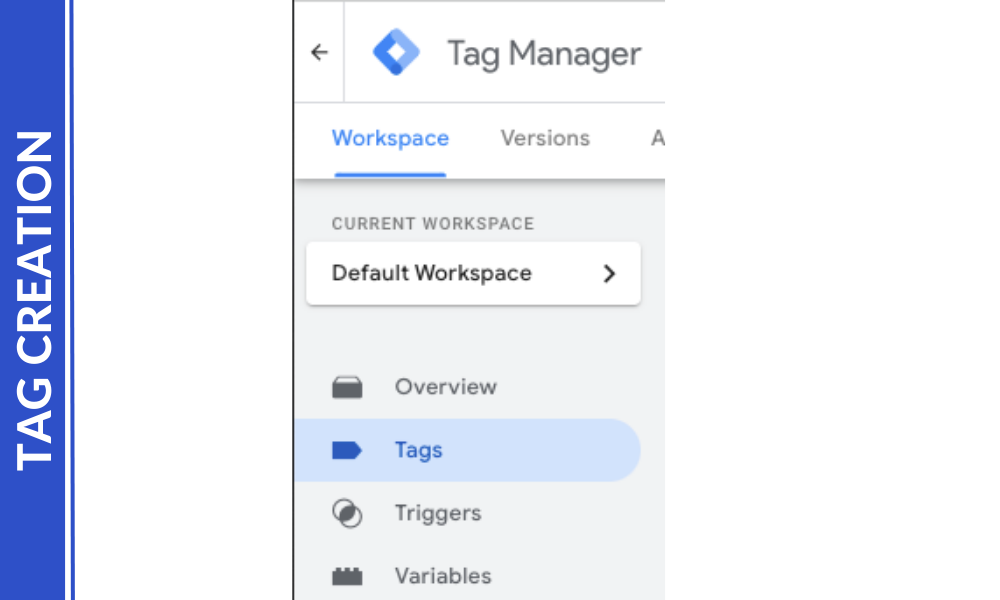
Step 6: Tag Setup
Go to Google Tag Manager and find “Tags” on the side bar. Then click “New”.
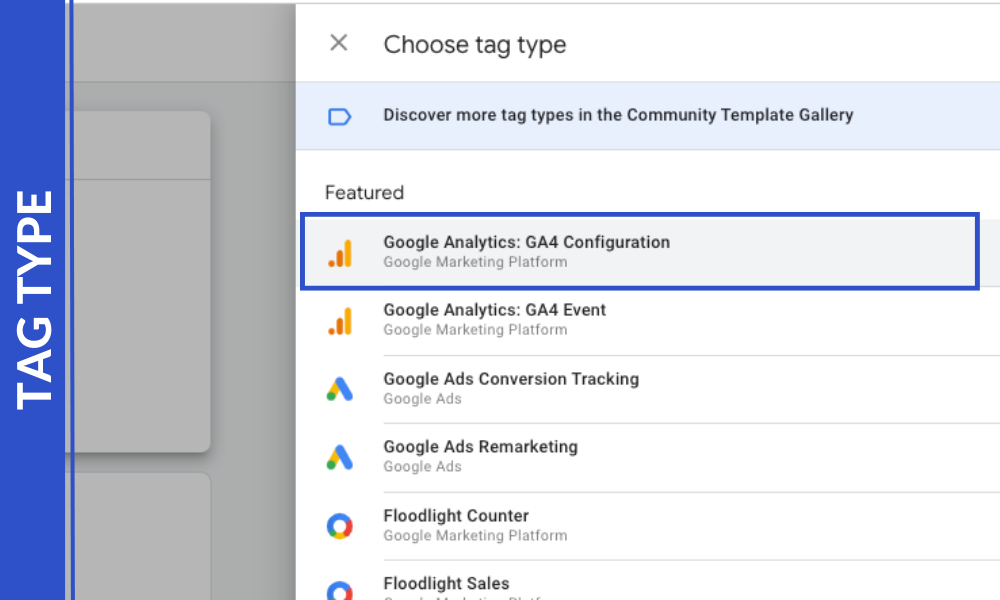
Step 7: Choose GA4 Configuration
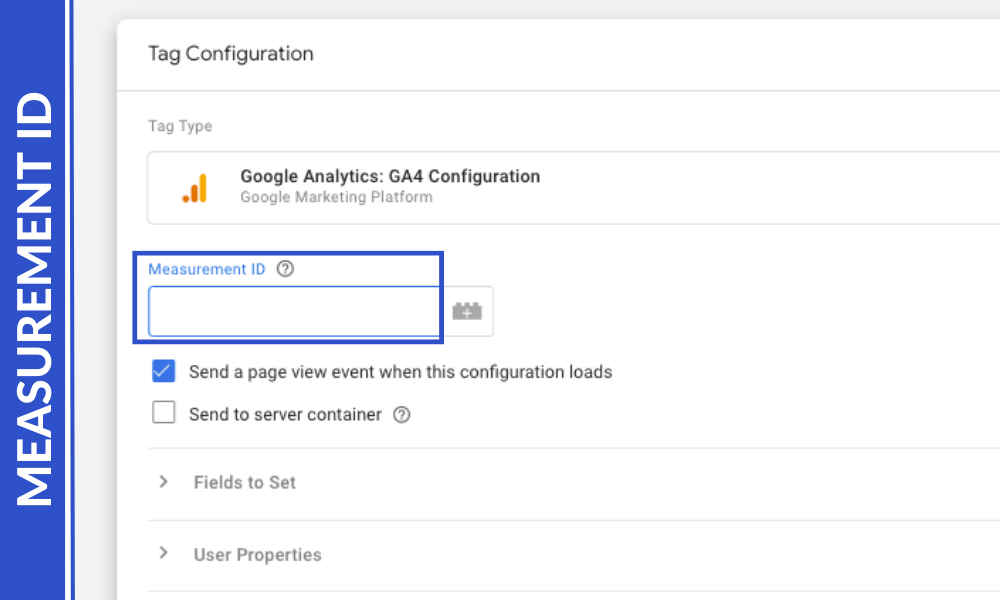
Step 8: Insert the Measurement ID on GTM
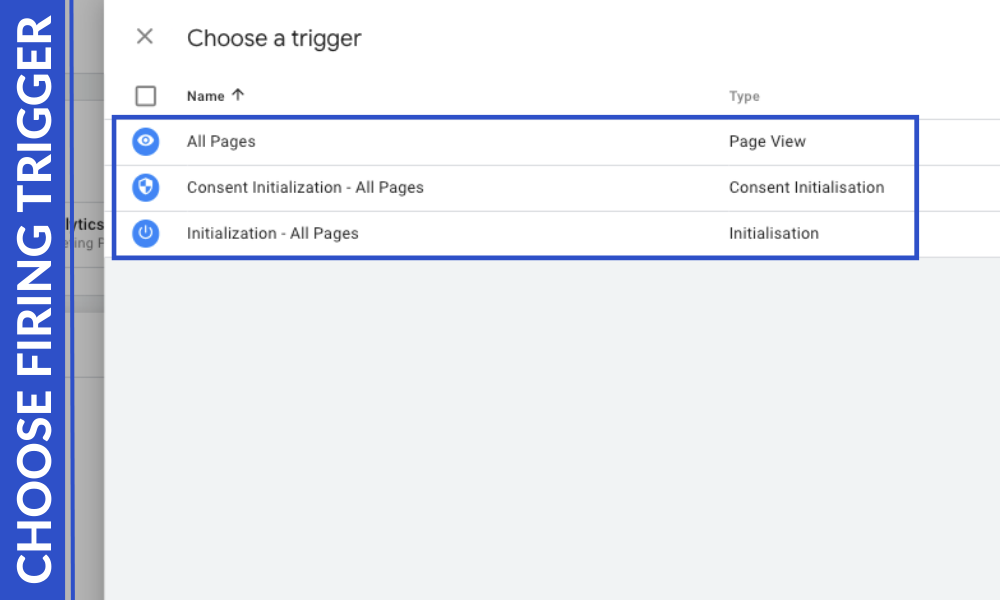
Step 9: Choose a trigger
In this case, generally “All Pages” will work for you if you are first time setting this up.
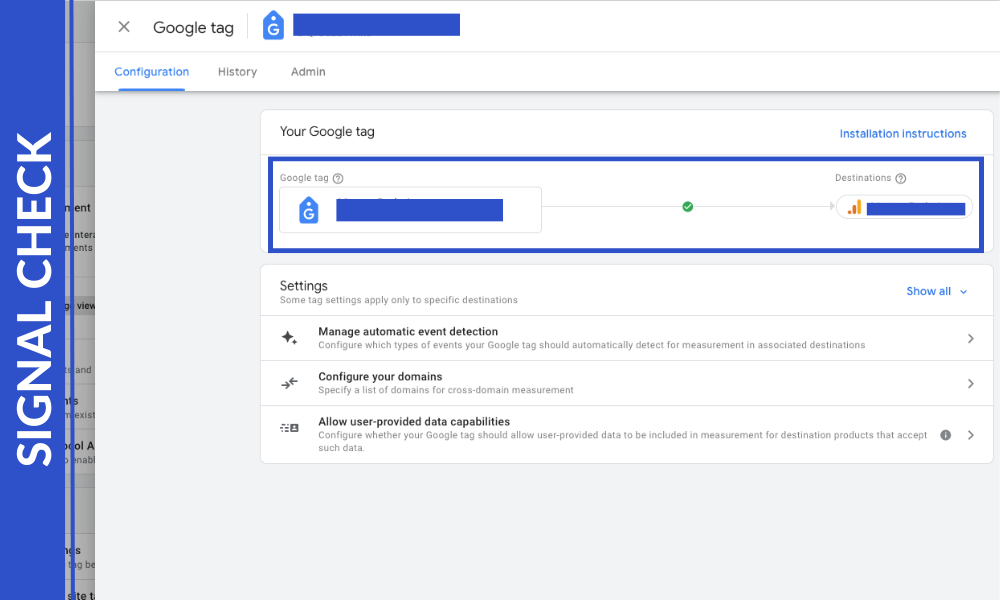
Step 10: Signal Check
Finally, go to GA4, click on Data Stream under Property.
Then, click “Configure tag settings”.
If you see a green tick in between Google tag and Destination, congrats, you are all set!
Setting Up Google Analytics 4 On A Shopify Site:
If you have a website that uses Shopify, you can follow these simple steps to set up GA4:

Step 1: Create a GA4 Property
To set up GA4, you need to create a property in your Google Analytics account. Go to your Google Analytics account and click on “Admin” at the bottom left of the screen. Then click on “Create Property” and choose “Google Analytics 4.” Follow the steps to set it up.
Step 2a: Install Google Analytics 4 Tracking Code
To install GA4 on your Shopify site, you need to add a tracking code to your website. In your Shopify dashboard, go to “Online Store” and click on “Preferences.”

Step 2b: Click Manage Pixel
Click ‘Manage pixel here’ button.

Step 2c: Connect Shopify to GA4
Click on connect button to link Shopify to GA4.
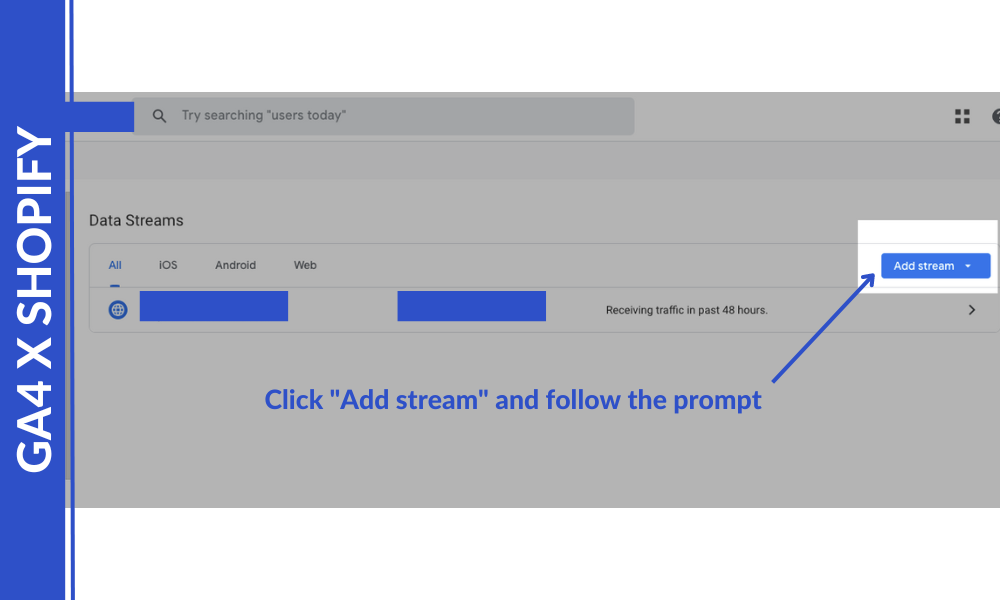
Step 3: Configure Data Streams
Data streams connect your website or app to your GA4 property. To set up a data stream, go to “Data Streams” in your GA4 property, choose “Web” or “Apps” depending on what you want to track, and follow the steps.

Step 4: Set Up Events
Events are the way to track user interactions on your website or app. You can set up events using the Events screen in your GA4 property, or you can use Google Tag Manager to set them up.
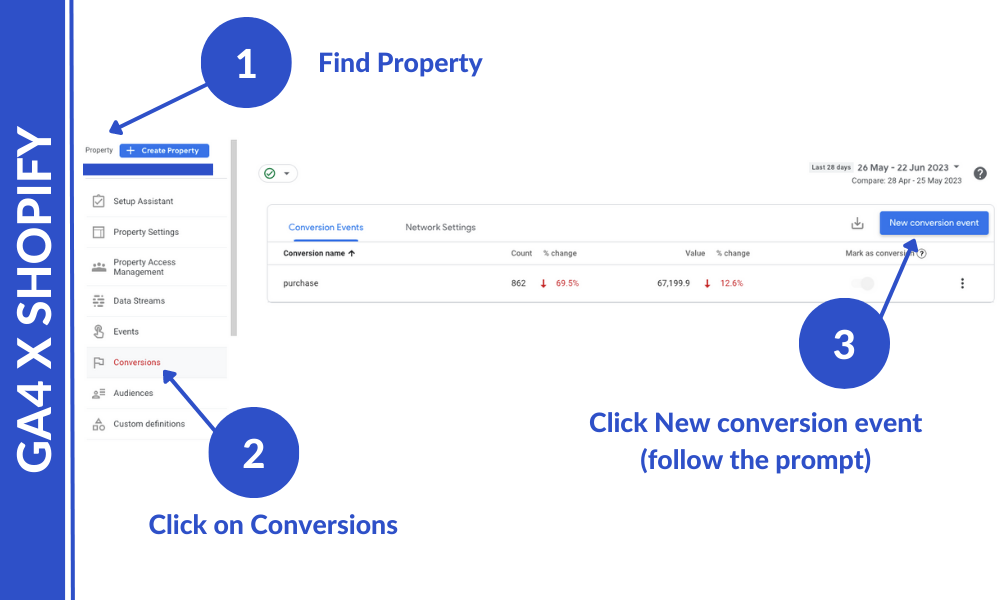
Step 5: Configure Conversion Tracking
Conversion tracking helps you track when people take specific actions on your website, like completing a purchase. To set it up, go to “Conversions” in your GA4 property and follow the steps.
Conclusion:
Google Analytics is a powerful tool that can help you track your website traffic and user behavior, so you can make better decisions about your marketing.
By following the steps outlined in this guide, you can easily set up GA4 on your WordPress or Shopify site and start collecting valuable data to improve your marketing strategies.
At our PPC agency in Australia, we use tools like Google Analytics to help businesses optimize their marketing efforts and get more traffic to their websites. By understanding your website traffic and user behavior, you can create better content, target the right audience, and increase your conversions.
If you need help setting up GA4 or optimizing your marketing strategies, don’t hesitate to contact us. We’re here to help you get the most out of your website and grow your business.


